Oil tanks are the staple heating solution for millions of homes and as efficient as they are, eventually you will need to replace yours. Good news is, if you are short on cash, or an avid DIY enthusiast, you can do it yourself. Here are six steps that you can follow to ensure the successful and safe removal of your old oil tank.
Shared via villagegreenj.com
Six Steps to Removing an Old Fuel Tank
#1 Pumping Old Oil from the Tank
The first step in removing your old tank from your basement is to pump out all of its contents. The old oil can even be recycled and reused in your new oil tank sometimes. However, if you have chosen to replace your oil tank with modern technology, then arrange to have the old oil collected by a waste management company that can safely recycle and distribute the old oil. Start the transfer process by using a transfer pump that is explosion-resistant. Transfer the oil to a 55-gallon drum that is transported easily.
#2 Cutting Open the Tank
Once the fuel has successfully been removed from the tank, it’s time to get to work and cut open the tank. Many people think that if they were to cut the pipework, the resultant sparks from the cutting tool would ignite fumes and old oil. This is not the case. The flash point of the old oil and fumes is well above the heat produced by any spark, and you are assured of a successful cut without burning the house down. Use a reciprocating saw to cut into the 12-gauge body of the tank and open it up.
#3 Clean the Tank
This step is where things can get dirty. The best way to approach cleaning an old oil tank for removal is twofold. The first step involves scraping down the sidewalls of the tank as best as possible. After the sidewalls are clean, use a five-gallon jug to scoop out all of the sludge from the bottom of the tank and store the sludge in a 55-gallon drum.
#4 Recycling Sludge
The sludge found at the bottom of the old oil tank consists of particles that have accumulated over the years of use. This sludge still serves an industrial purpose and will be sold to industry to be burned in various processes. Do not just throw away your sludge into the trash. This action is prohibited by local state authorities because it will poison the water supply. Instead, arrange removal of the oil with a specialist company that can dispose of the sludge properly.
#5 Cutting the Pipes
Cutting the pipework to your old oil tank is necessary for the removal process. Begin by severing the fill and vent pipes, blocking off the holes with a patching compound that’s made from cement. This patch will prevent any spills that could be environmentally hazardous. This task best suits your reciprocating saw or a grinder fitted with a cutting disc.
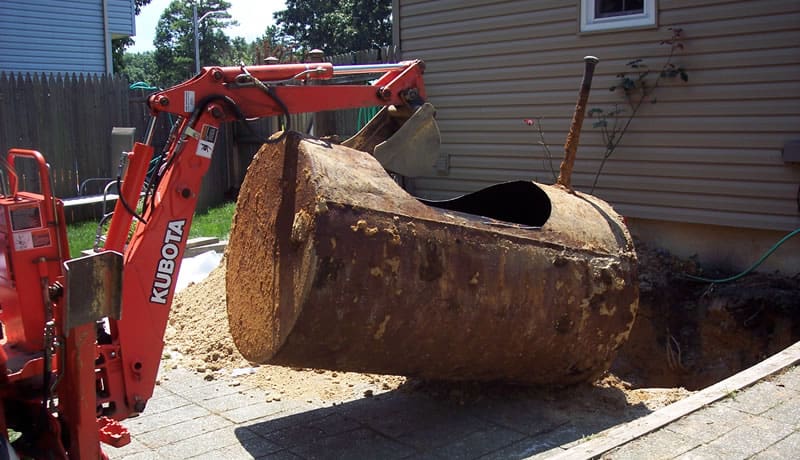
#6 Removal
This step is where the real effort takes place. Getting the tank from your basement into your yard can be done in one of two ways. The first and simplest method is to remove it through the basement bulkhead and out into your yard. However, if your bulkhead is too small, you may need to cut the tank into smaller pieces to allow removal from your basement.
For those that have a tank in their garage or outhouse, this step may not be as much of a challenge. However, at all times, make sure that you are using the correct safety equipment. Purchase or hire all of your lifting equipment from certified professionals such as Tway Lifting. They have the necessary lifting tools that you will need to get the job done right, without any injury to yourself or your employees.
Once the old oil tank is removed, you can arrange for collection of the tank and its oil. Old oil tanks are inspected by scrapyards and then recycled, allowing for the materials to be used in other applications and products.
Wrapping Up
You could go to all of the hassle of taking on this job yourself, or you can choose to work with professionals that will do it for you. Stick to the Oil Tank Experts and make sure that the job is done right the first time. The only thing worse than an old, leaking oil tank, is a new installation that has to be replaced because of incorrect installation. Choose a company that has a solid reputation and provide a money-back guarantee on their workmanship. Selecting the right contractor for the job will ensure that your oil tank system lasts for decades to come.
